|
|
|
|
|
Jaguar Fuel Pump Replacement 2000 XK8This procedure was put together by Charles Bennett and he did a great job doing it. This procedure is in a PDF format Fuel Pump Replacement
My Replacement 1999 XK8
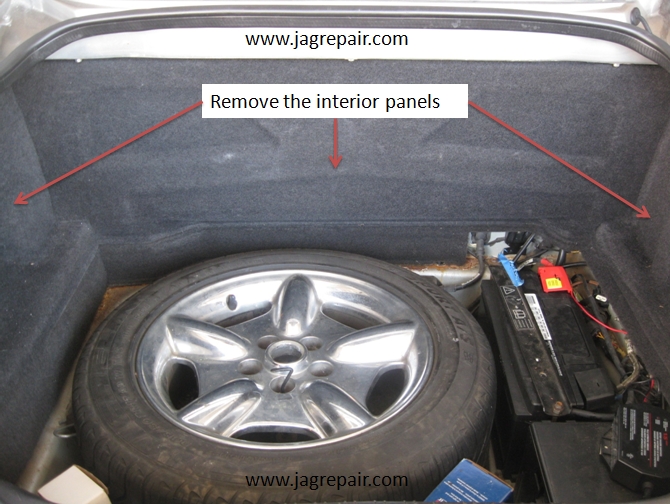
I have been putting off replacing the fuel pump for a long time. I had been measuring fuel pressure off and on and noticed that it would only go up to 30psi and when I shut the car down the pressure would drop off to “O” in a short period of time. I had the new fuel pump in the trunk of the car in the event it failed. So I forced myself to replace it. That was cheaper than having it towed and someone else changing it. After the pump was replaced I got 30 to 32 psi when running and after shutdown it went up to 40 psi then the drop off was much slower. I got my warm and fuzzy! This project took me much longer than I thought and the reason why was that I kept dropping the extraction tool for the two lines going into the tank from under the car. It has been said that the area at the two lines was tight and they were right. My large hands did not make the situation any better. This is how I did the job and I hope it helps! Just a side note: Yes, I took care of all the rust in the trunk. I am soon to start on the cosmetics inside and out on this car. I first lowered the two windows and opened the trunk prior to disconnecting the battery. Removing the interior panels is not hard if you know the sequence. I first removed the shelf. then the tank cover and then the two sides.
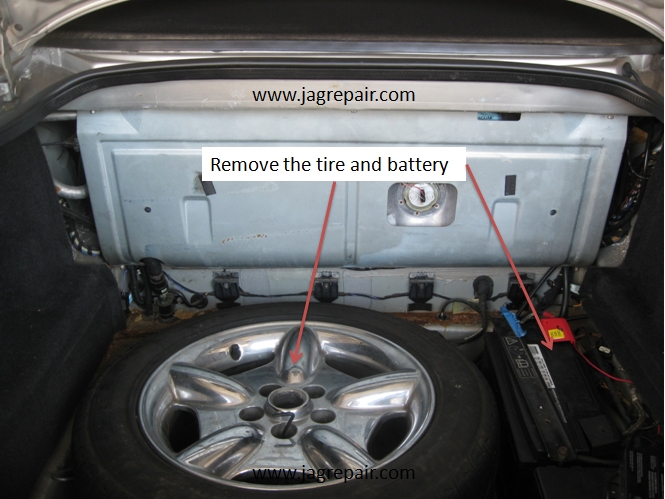
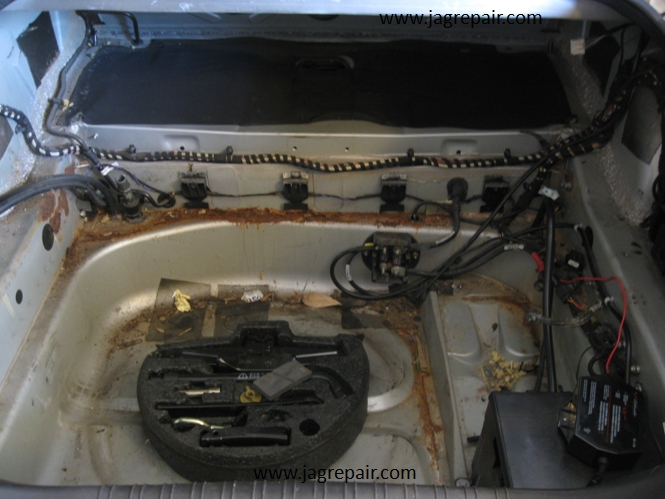
Then removed the tire and battery.
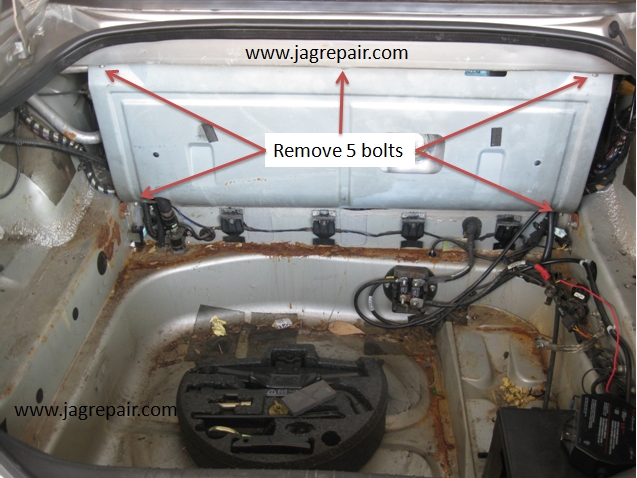
With the tank cover removed you will need to remove the tank retaining cover. You will find 3 bolts on top and 2 bolts on the bottom. I did notice when going back to it you should put the 2 bottom ones in first, then the 3 on top.
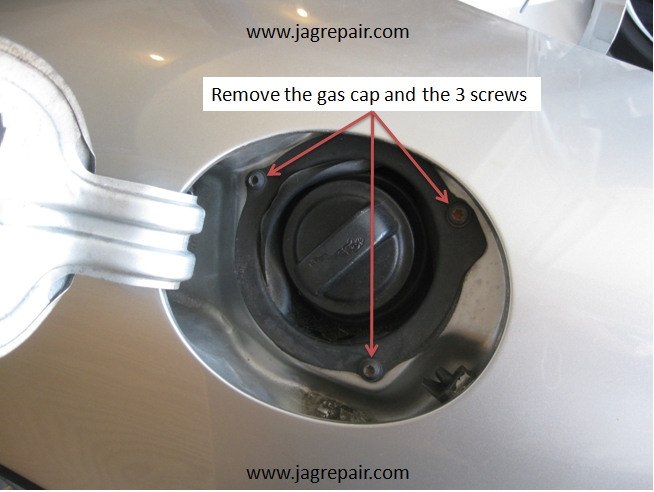
Remove your gas cap and drain your tank. I did not start this until I had less than a ¼ tank of fuel. Once drained, I removed the 3 screws at the filler and pushed the rubber back into the trunk.
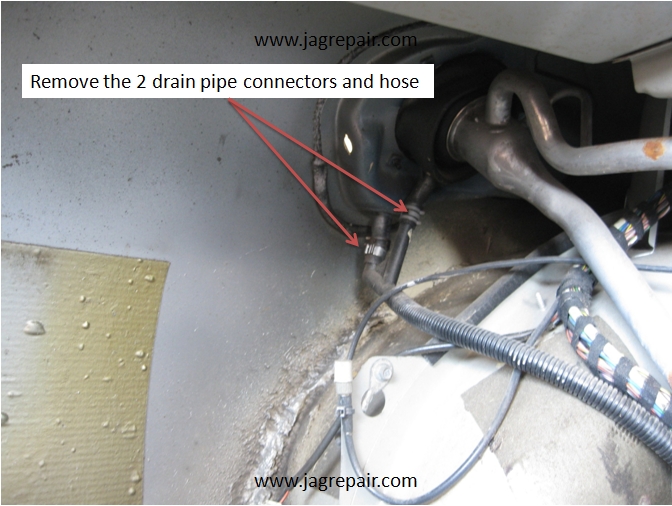
On the inside you need to remove the tank filler latch (not shown). To do this hold the latch inside the trunk and on the outside just turn nut about a ¼ of a turn and it will come out. It is a bayonet type connection. Once that is removed, disconnect the 2 drain hoses.
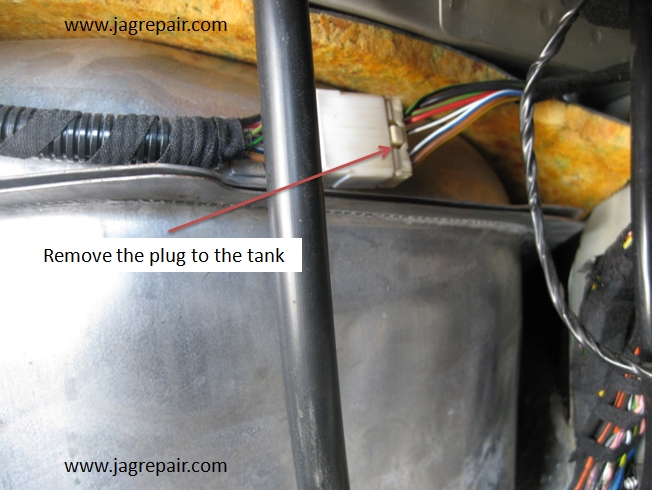
To the right of the tank is the plug for the pump and float. Just remove the plug.
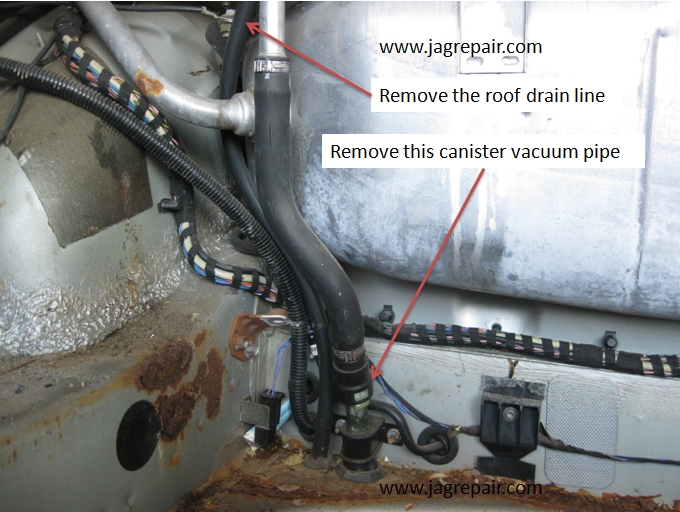
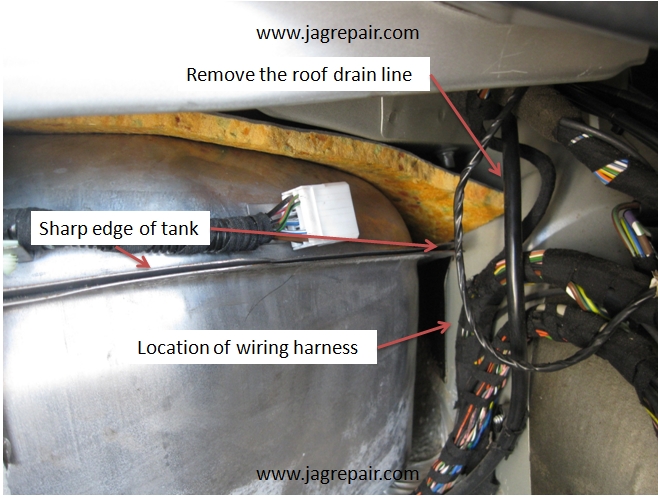
You have 3 lines to remove, two on the left and one on the right. Just pull down the roof drain. Just push in on the the canister pipe tabs and lift the hose off. See the next photo.
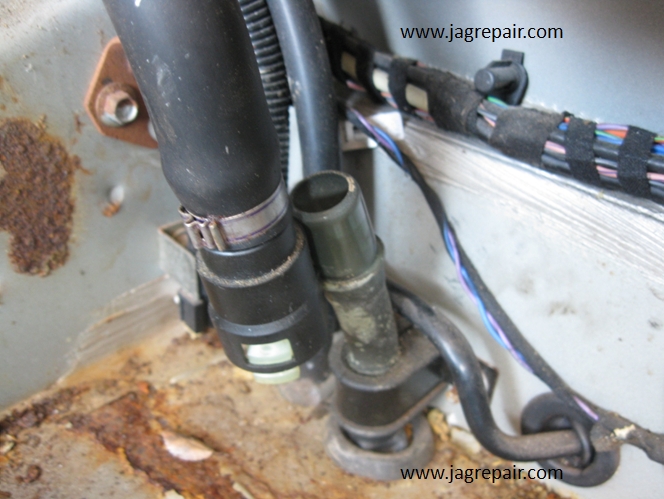
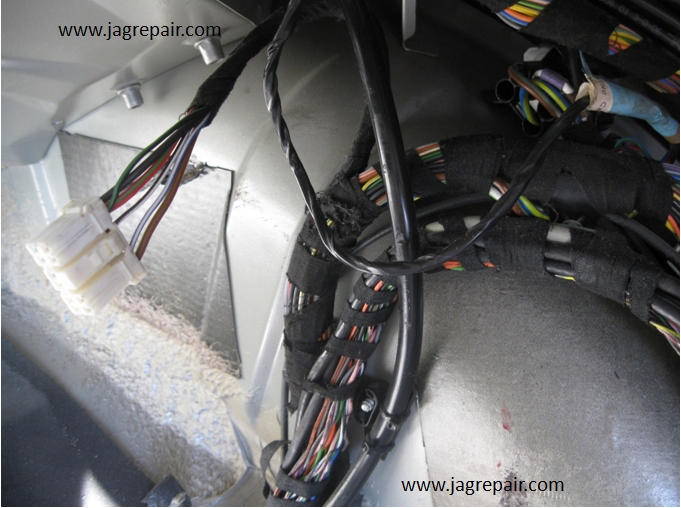
This is the other roof drain line. It has been mentioned that the tank has sharp edges and they are correct. I was very uncomfortable with the wiring being so close.
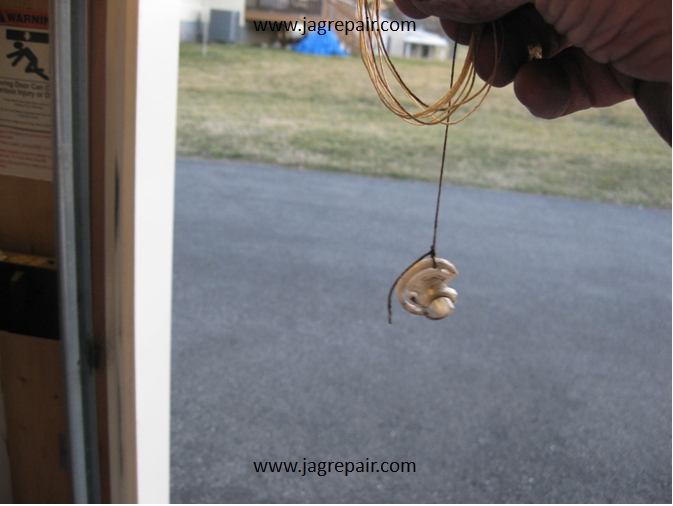
Now the hard part!! I have a car lift and it was not as hard as it could have been if it were on the ground. I had the most difficult time getting the removal tool on the lines. I lost one and could not find the second one two or 3 times. I finally put a string on it and every time I would drop it I could retrieve it. Once I got it on I just pushed it in with a screwdriver and pulled back on the lines and they came right out. I did however spray the ports for the lines with PB Blaster in the event they were rusted.
The tank removed and now for scrapping, cleaning and painting with primer and paint.
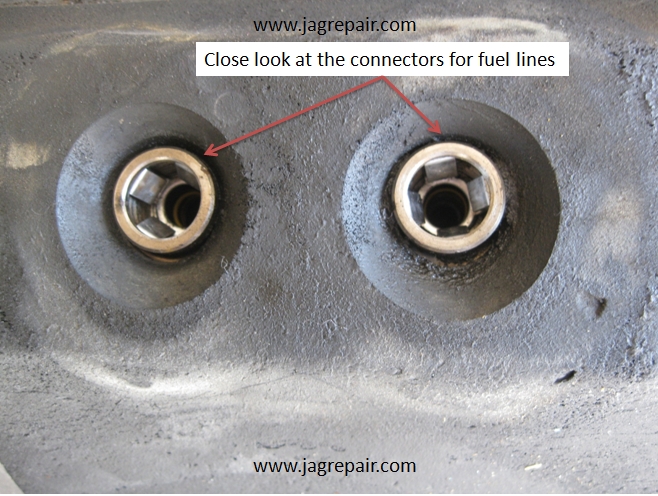
One of the things I did was to clean the lines and the tank connections. Notice no rust.
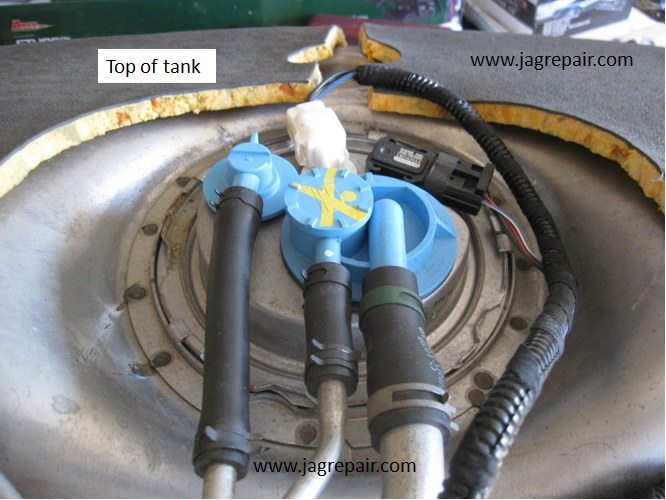
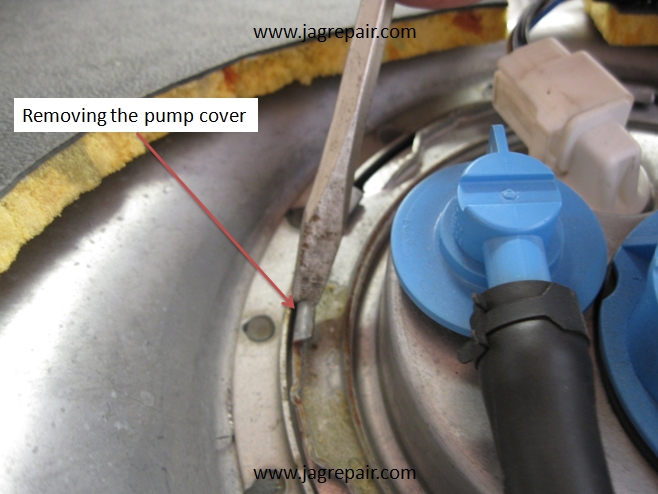
Now to remove the top of the tank. To reach the pump you will need to remove the locking ring. This is not difficult but should be done correctly. Unless you have the tool I would recommend using a screwdriver and a small hammer. Tap the locking ring on all the tabs. I say this because you do not want to continue hammering on one tab. You will find that it will come off a lot easier if you use all the tabs. I would also recommend putting it on in the same way.
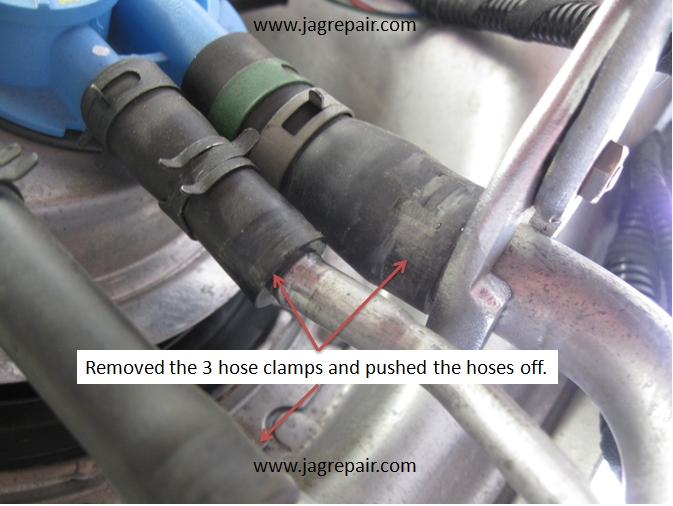
Now before you start pulling and tugging to get the top off you want to relocate the clamps on the hoses and get the hoses off. Now look at the hoses, one side is plastic and the other is metal. I elected to remove the hoses from the metal lines. I used the good old pliers around the pipe and used it to apply pressure to push the hose away so not to put pressure on the plastic pipe.
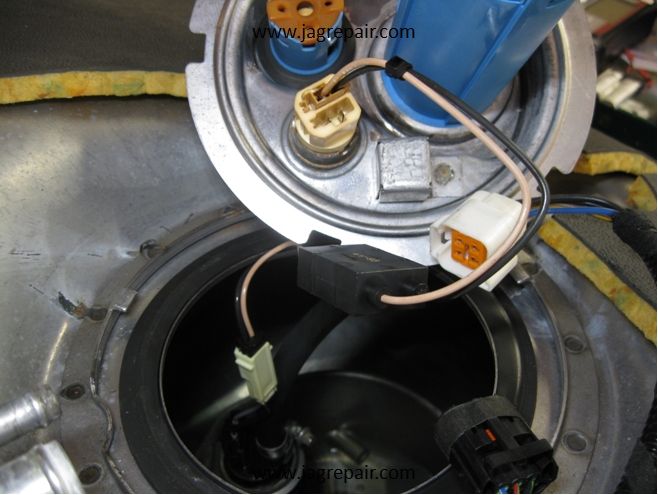
Now I got the top off. Use caution not to apply any excessive pressure on any part of it.
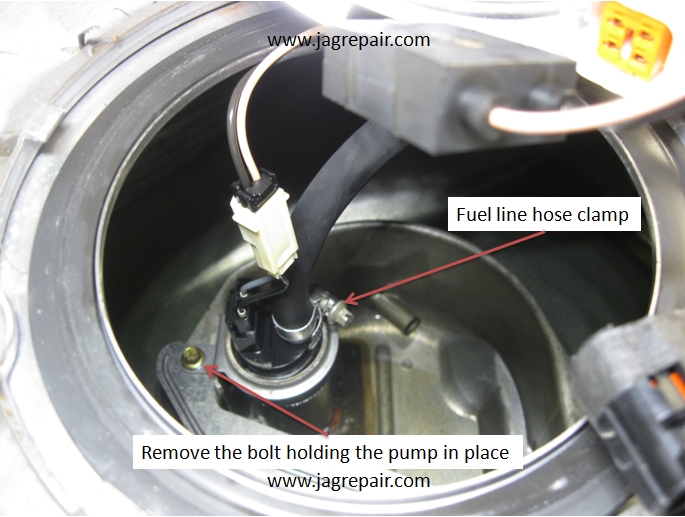
You only have one bolt holding the pump in place. Remove it and the clamp on the hose and you can remove the old pump. Use caution not to pull and tug on the fuel line in the tank.
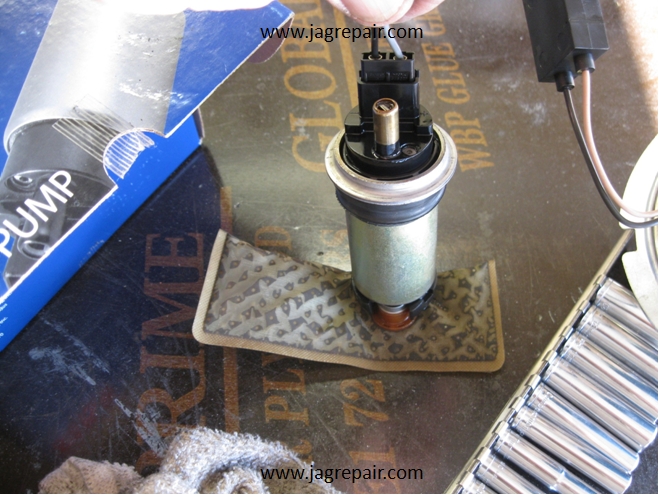
The old pump removed.
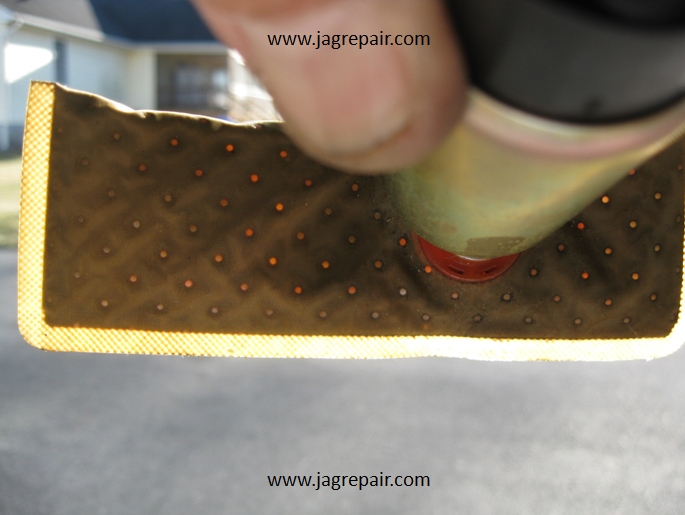
This filter is in the direct sunlight. Looks dirty!
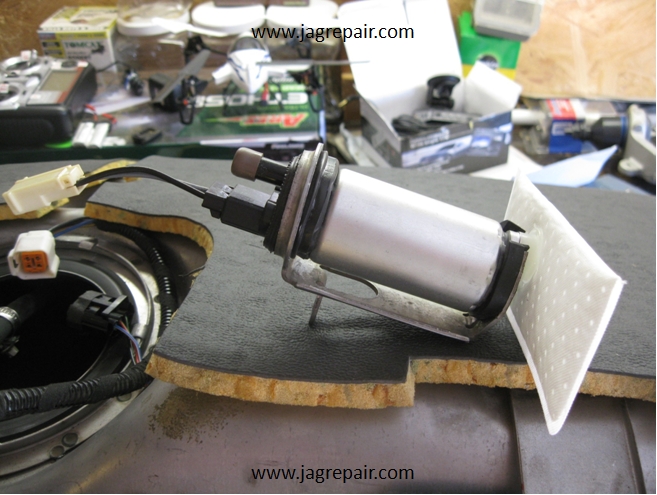
Old pump out and the new one ready to install. Now in my haste to get it back together I did not take any photos on how to mount the new pump in the bracket so I will try to explain. The top and bottom of the mounting bracket clamps the pump in place. The rubber on the top and bottom of the pump are a suppressor against motor noise and movement when the pump is turned on. Be sure you install it correctly and tight. Be sure all of your wiring is tight, locked into place and done correctly. You do not want to do this again.
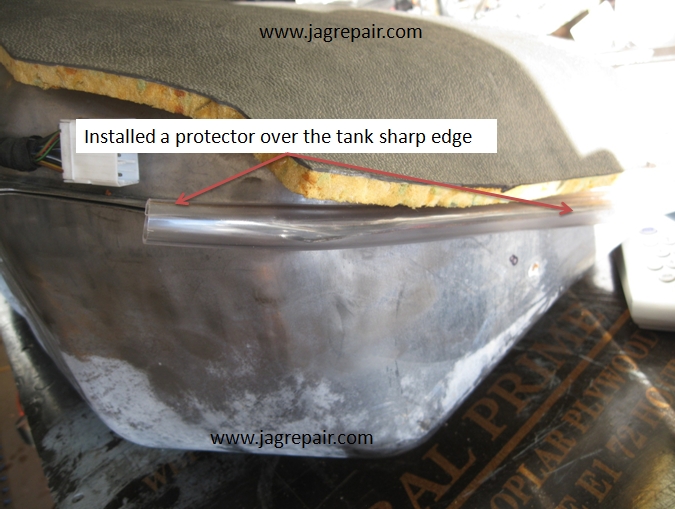
Earlier I was very concerned about the sharp edges on the tank so I elected to take a rubber hose and covered both sides so I could reinstall the tank and not cut any wires in the process. I should mention I inspected both wire bundles for damage after it was removed and installed.
Thought I would add a photo of the tool and string setup for you. This thing was a real PITA!!
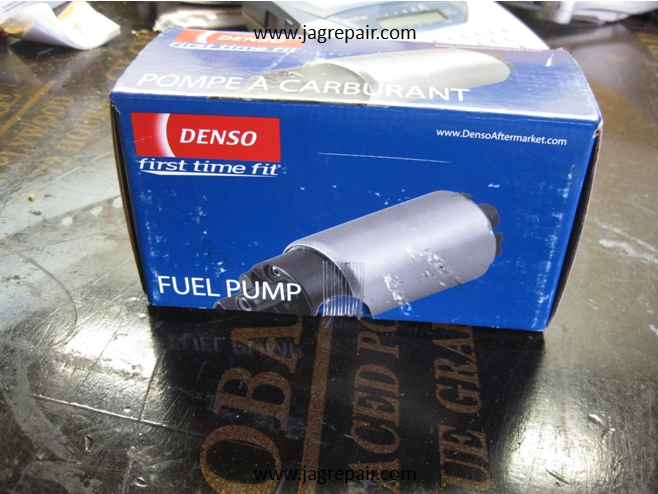
I am sure you all were wondering what pump I put in. This is it. This fuel pump and box have been in the trunk for a few years.
Like I said this was a job I did not want to do but I am glad I did it. One thing for sure is if you did this on the ground I feel your pain. I hope this information helps.
|
|
|