|
XK8 Roof Operational Test Box
As most of you know I have provided a lot of
information on the XK8 and it’s roof operation. Over the past several
weeks I have been working on a test box that would take the guess work
out of trouble shooting the roof operating system and this is what I
came up with.
This is my first attempt to test the motor and
solenoid operation. It
worked well with the exception of a low voltage operation that was the
result of a poor connection at the pump.
That was my fault.
Link to Test Box #1 Open operation
https://www.youtube.com/watch?v=roCzkOpx3d4
Link to Test Box#1 Closed operation
https://www.youtube.com/watch?v=bh_OohLHkDQ
As you can see it worked well but I was not
satisfied. I wanted to know more information on the full operation so I
contacted my friend
whitexkr on
http://jaguarforums.com/ his web page
http://thejagwrangler.com/ and asked him if it was
something he could make and he said sure.
We talked about the operation and what I was looking for and
showed him what I came up with on the first test box and as a result we
came up with this test box.
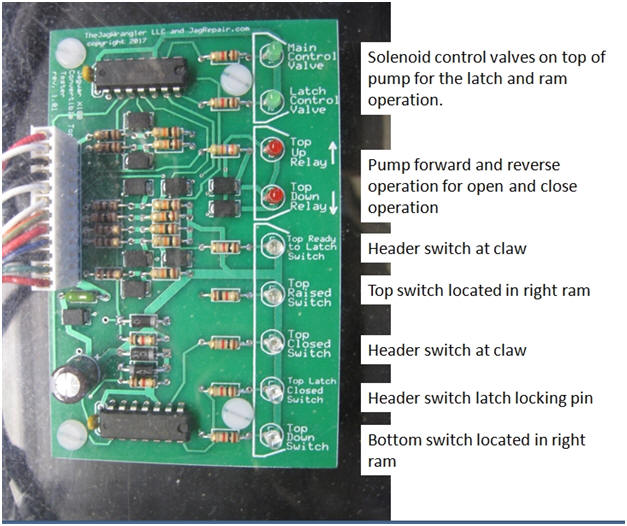
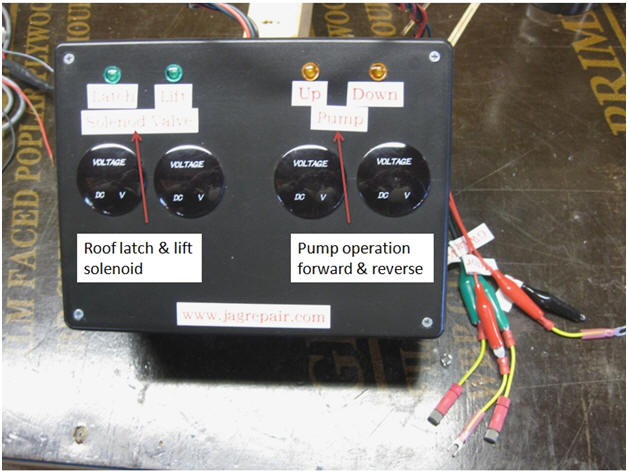
This test box covers all operation with switch
status, solenoid operation and motor operation.
After checking the roof operation with this test box it matched
the operating sequence as outlined in the Jaguar TSB 501-11A without
exception. I was pleased to
see that this could be done.
Link to TSB 501-11AM
http://jagrepair.com/images/AutoRepairPhotos/501-11AM.pdf
Now keep in mind that this roof operation is
dependent on all the switches in the header and rams operating properly,
the pump, switches and solenoids being in sequence with the Engine and
Security module on demand with the roof switch in the car and the key
switch in the drivers door.
This unit will take the guess work out of improperly operating roof.
Links below will show the open and closed roof
operation with this test box.
Link to Test Box#2 Open
https://www.youtube.com/watch?v=lwq7VA8jytw
Link to Test Box#2 Close
https://www.youtube.com/watch?v=QcuGjIvTmSU
Now let me show you how this Test Box#2 connects.
First I always remove the ground lead to the battery each and
every time I pull a plug apart.
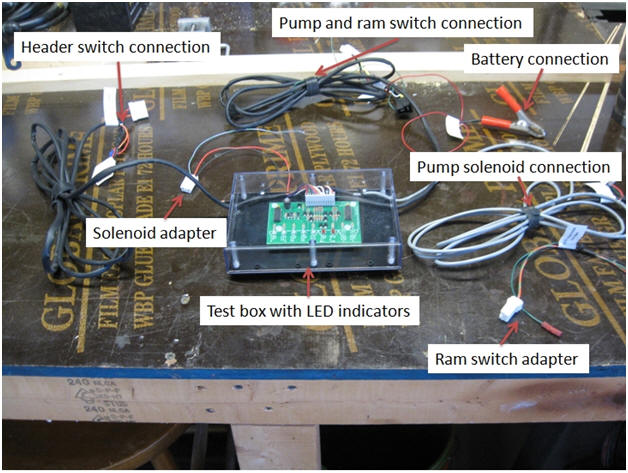
I was a little overwhelmed with all the connections
I saw at first but it was not as difficult as it appears. Most of it is
plug and play.
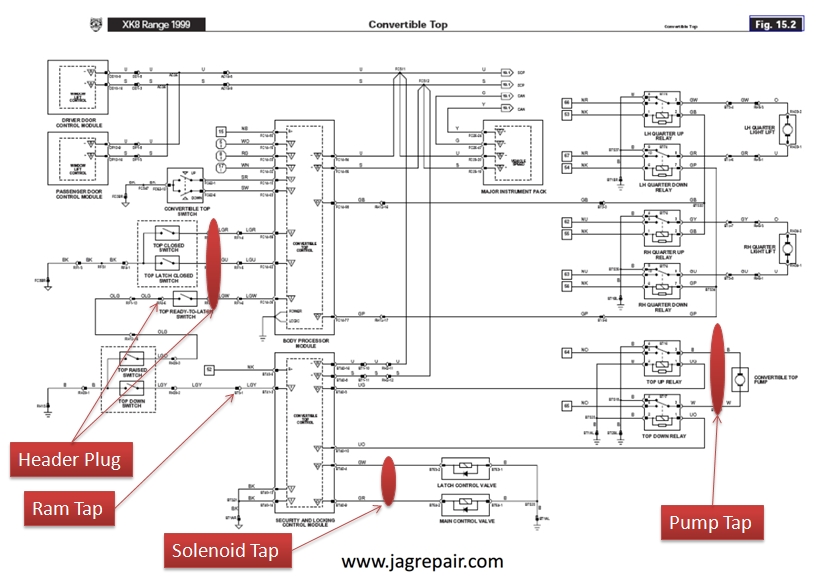
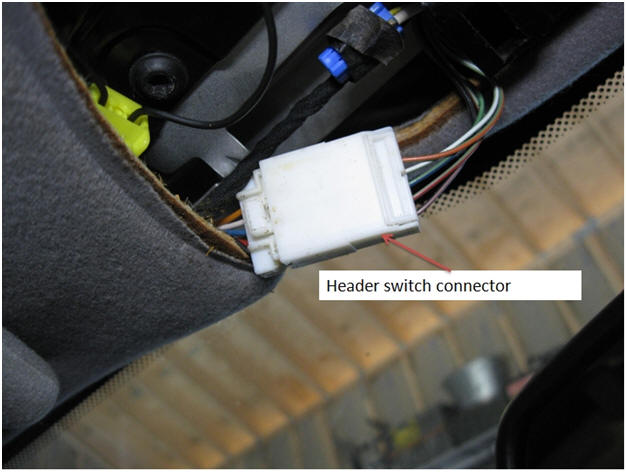
This header switch connector is located in the
header behind the center light fixture.
I removed the light fixture and unplugged the white plug to the
left. The same type and
size plug is located on the right but that is for the power to the
header light.
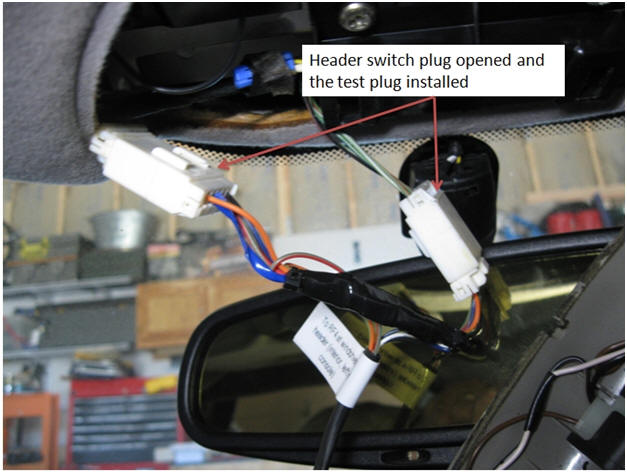
Installed the test plug in the header
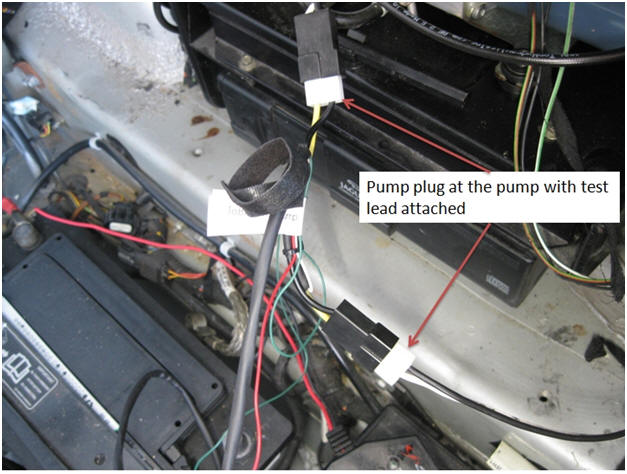
Installed the test plug at the pump
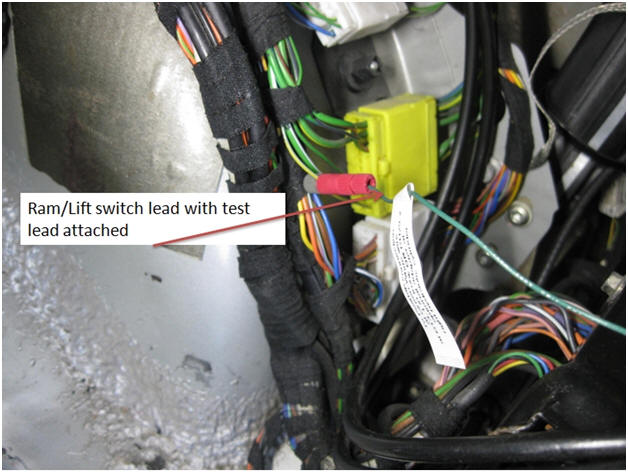
Now the a test plug was supplied but the plug is
located under the rear seat on the right so I elected to tap into that
lead for the ram switches that is located in the trunk at the wheel well
to keep from pulling the interior apart.
Note that the color codes are different between pre and post 2000
cars.
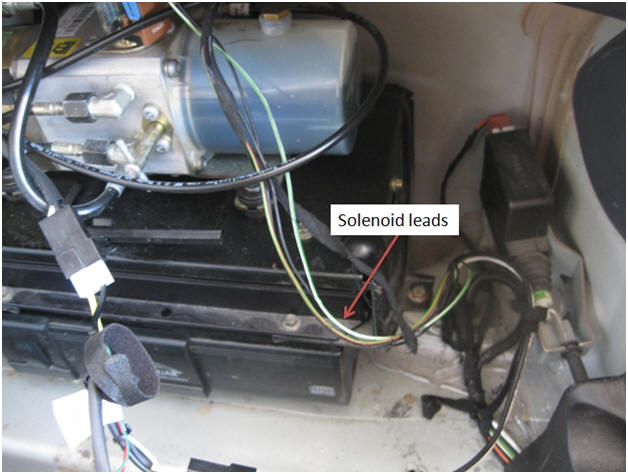
On the 1996 -1999 a factory plug was not provided
on the leads going to the solenoids so a pigtail was made to tap into
the leads. However, 2000 –
2006 does. Note that the
color codes are different between pre and post 2000 cars.
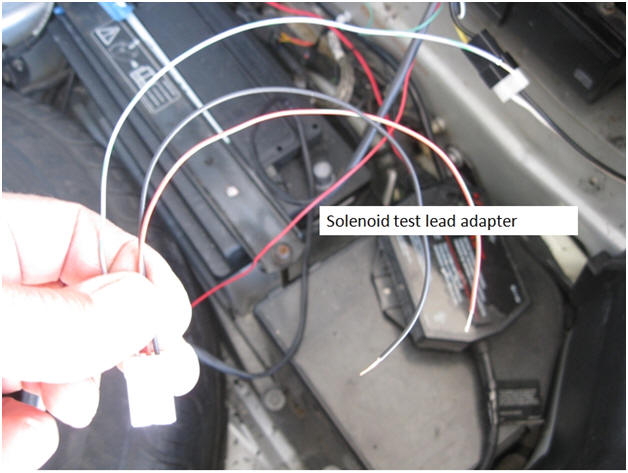
is the pigtail.
Note that the color codes are different between pre and post 2000
cars.
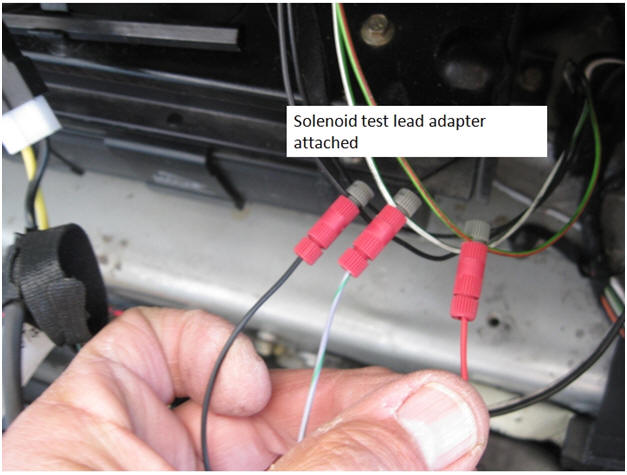
This is how I connected the pigtail to the leads to
the solenoids. Note that
the color codes are different between pre and post 2000 cars.
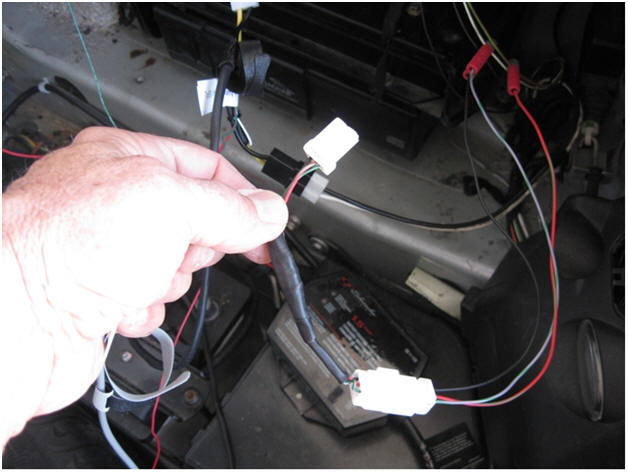
And this is how it connects to the test box leaving
the other plug out of the process.
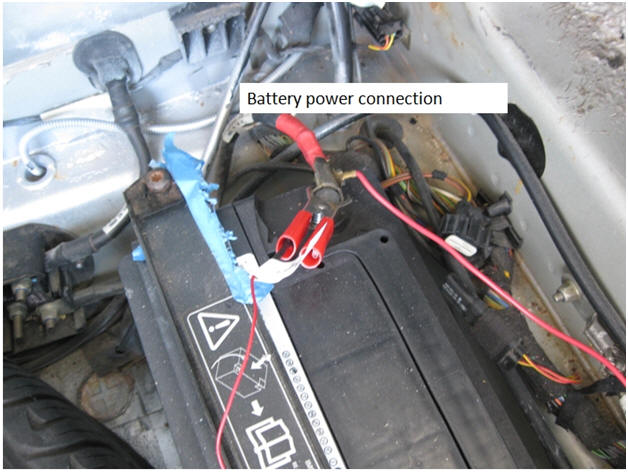
This was my last connection to the battery and I
was ready to make my tests.
|

