Roof Hose Replacement

For this procedure NOTE: This is for a 99 xk8. The '07 and up XK convertible top is completely different from the '97-'06 cars.

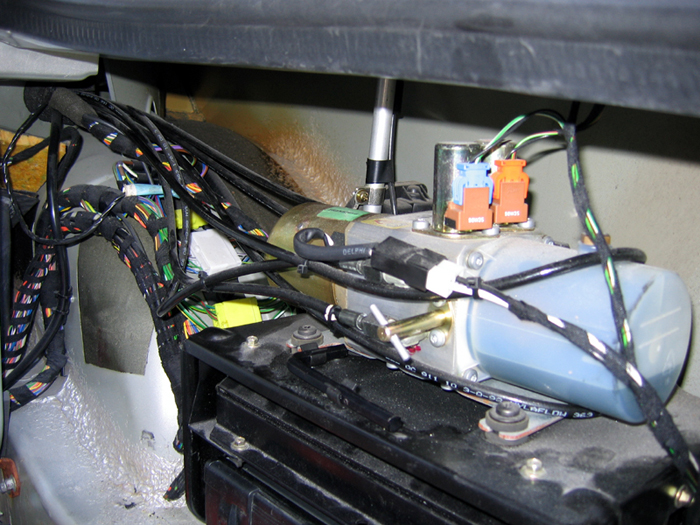
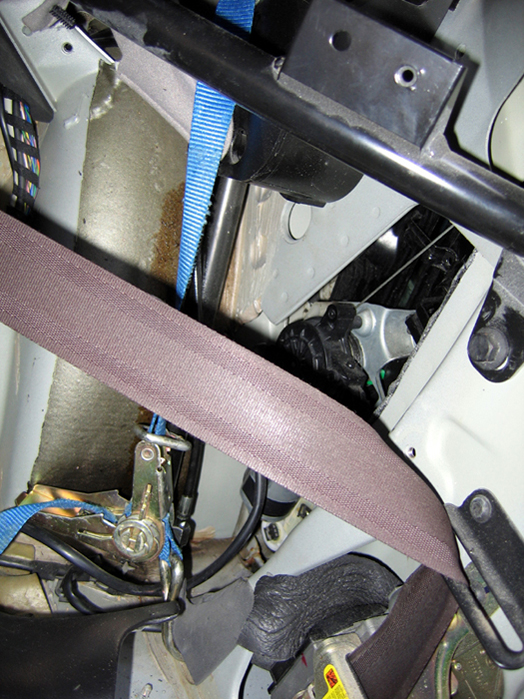
Hyd Pump located on the right side of the trunk area. Notice that the bottom hose has a marking tape (white). This is where I put the new hose line that had the "F" on it This set of hoses are directional and it is important to note the proper hose on the proper fitting.

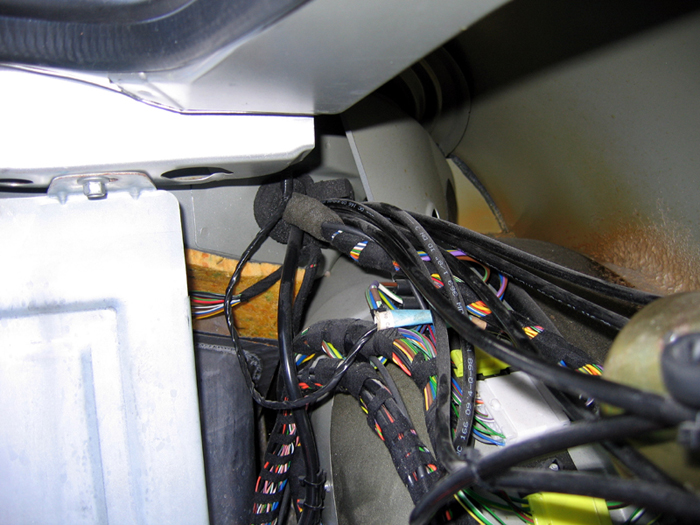
Hyd hoses goes into the bulkhead into the right rear of the roof compartment
 

Right rear roof compartment
 

Right rear roof compartment
 

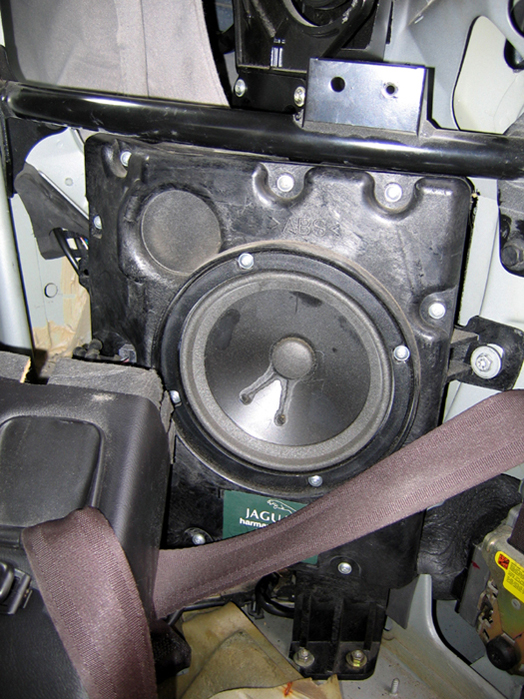
The Hyd lift and retract cylinder is located behind the rear speakers. You will need to remove the both of them. This speaker is from the left side

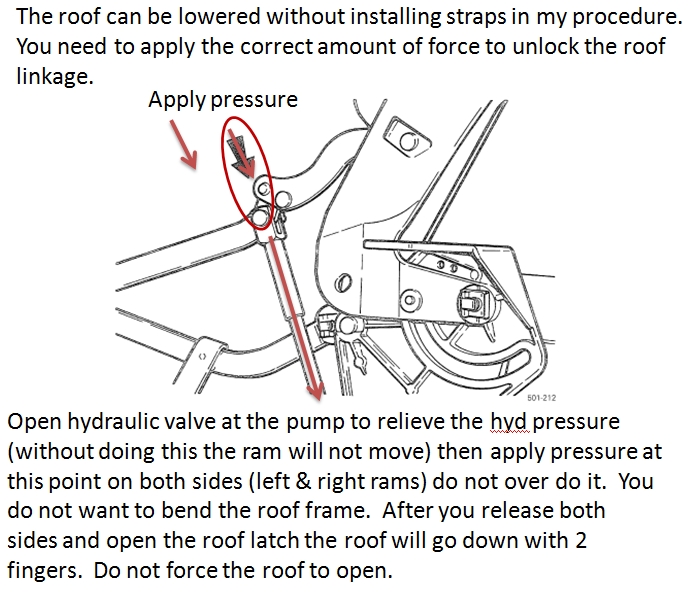
If you use this procedure to unlock the rams it will enable you to continue without removing the speakers and in many cases enable you to leave the rear seat back in place.  It will eliminate the use of the straps.

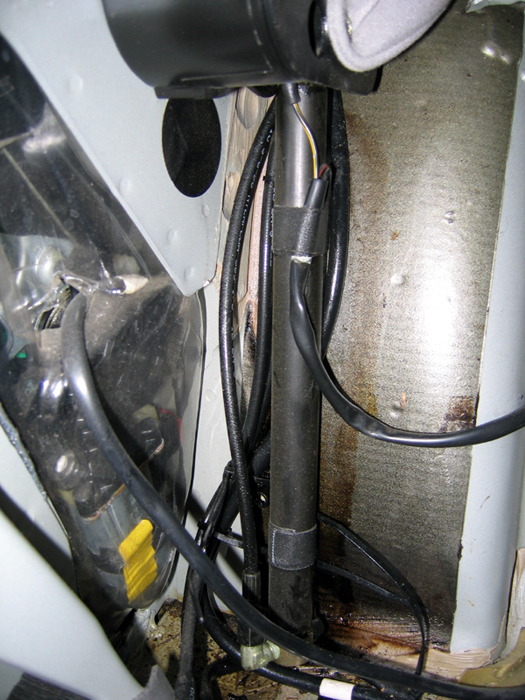
Hyd cylinder on the right side The right hand lift has wires connected and are critical to the window and latch operation.

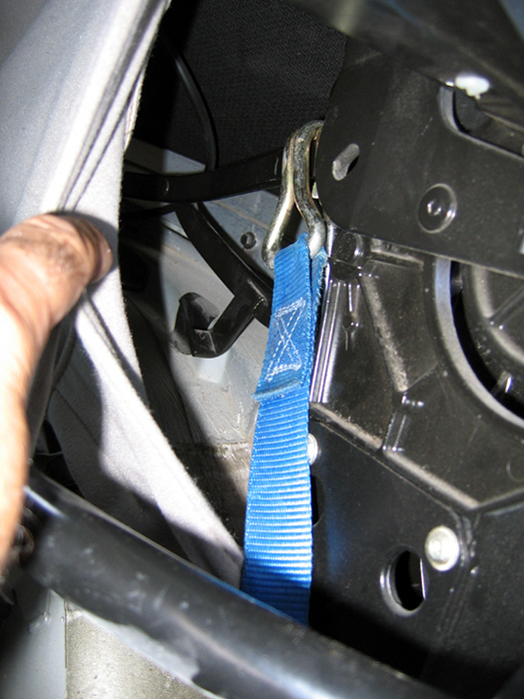
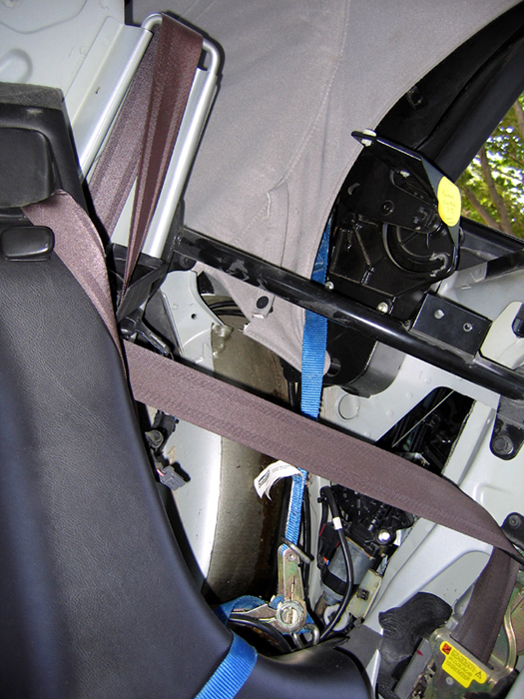
Tie down strap was used to release the tension on the roof frame. The top was connected to the top of the cylinder shaft. I had one on both sides 

The bottom was attached to the body located directly below the cylinder 
 

Another view The strap is not necessary if you can unlock the roof by hand. However, you do not want to bend anything associated wit the roof mechanism. Remember if it does not feel right the it may not be right. Use caution!

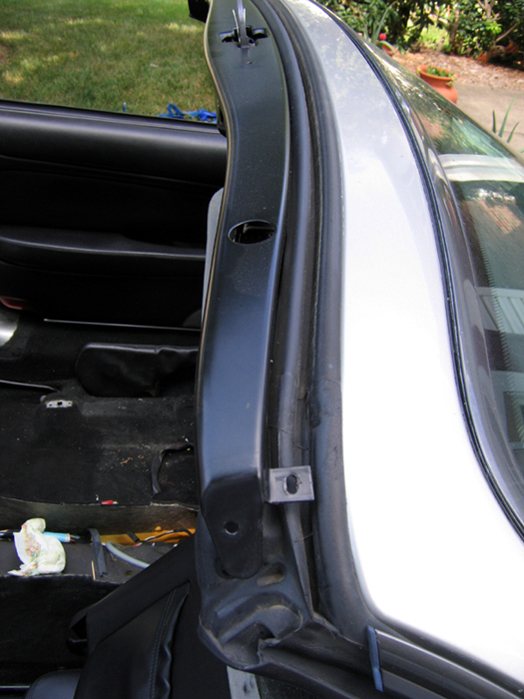
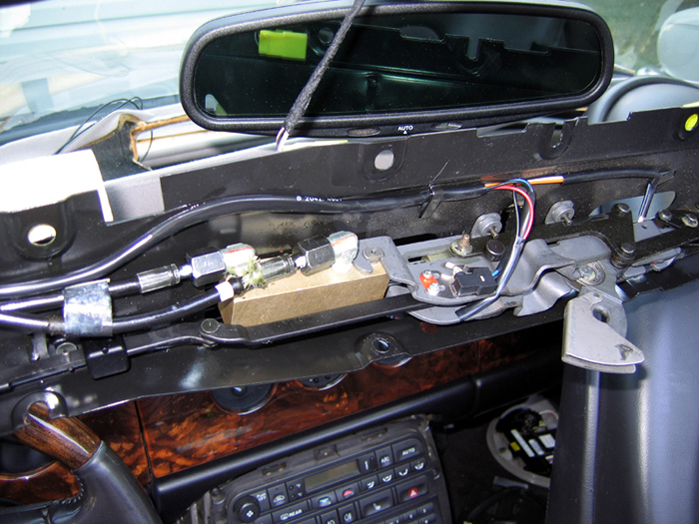
Now that the top is down I removed the top cap over the top of the locking mechanism. The screws were a little hard to reach under the rubber but be patient and take your time. You do not want to cut or tare the rubber seals.

Locking mechanism view from top 
 

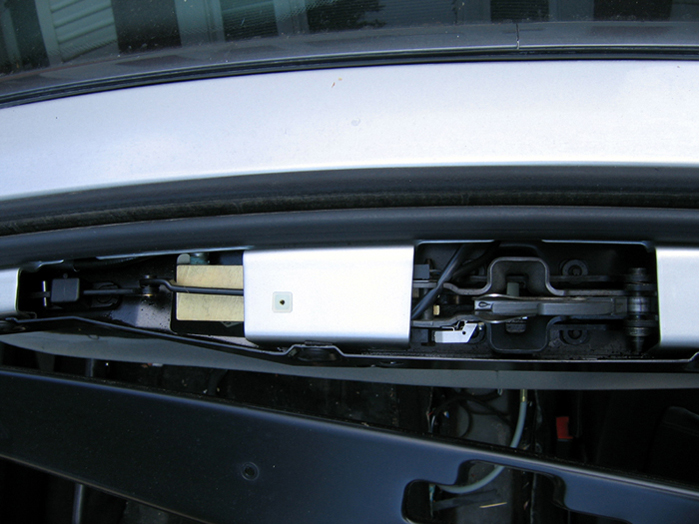
lowered the latching assembly and identified the leaking hose. Notice that the top hose has a marking tape (white). This is the one I put the new line on that had the "F" markings. This hose is directional! 
 

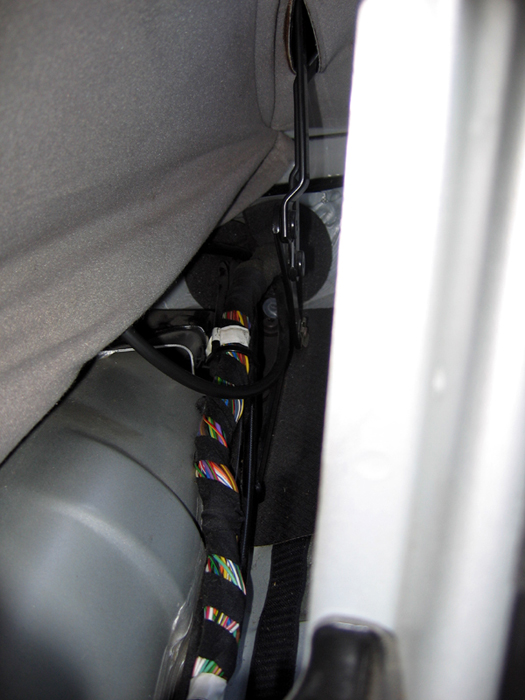
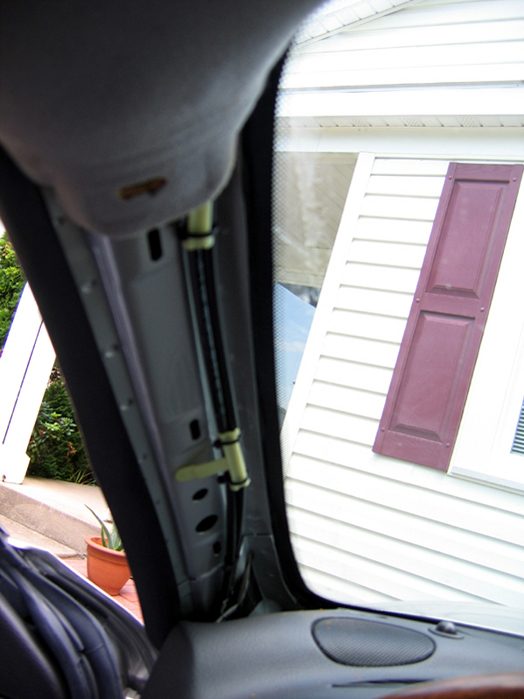
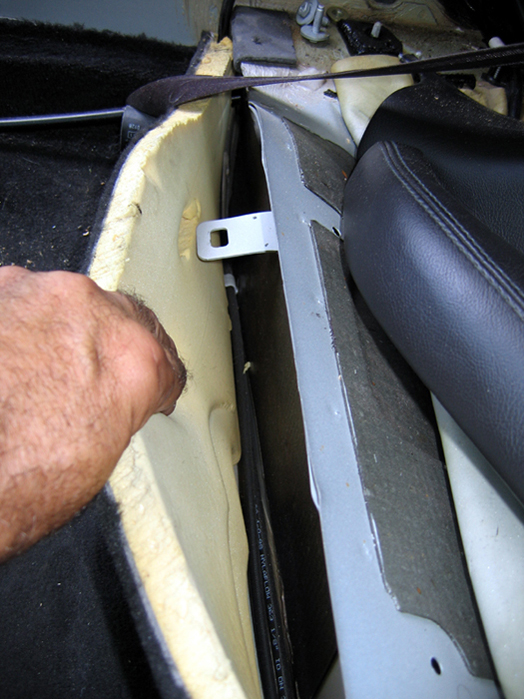
Hyd hose down the left pillar 
 

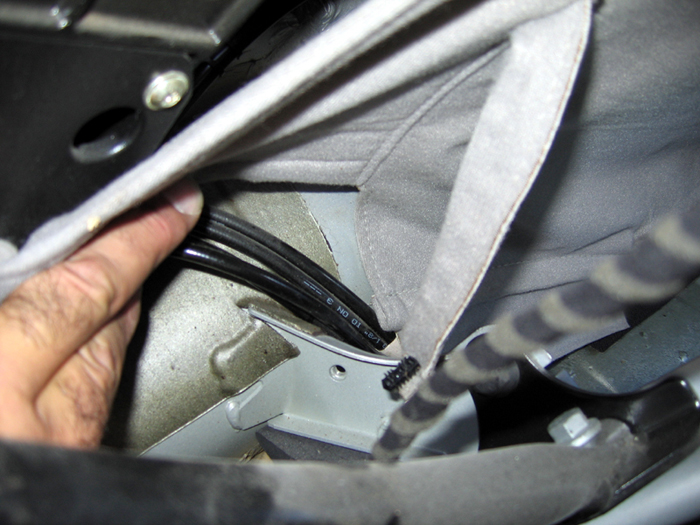
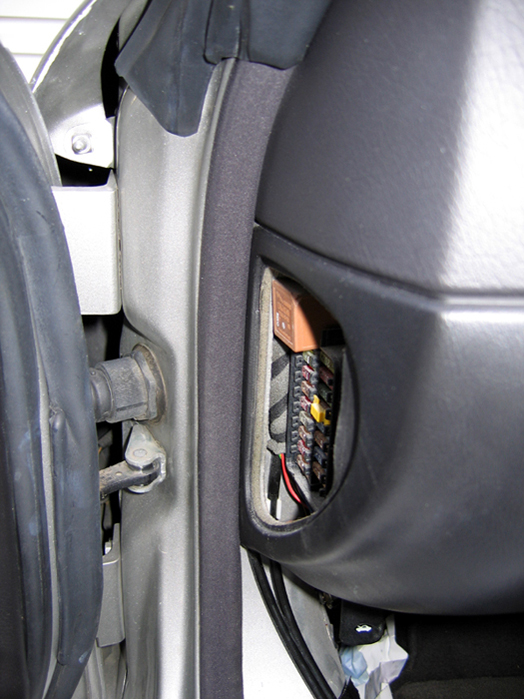
Down past the fuse panel on the left 
 

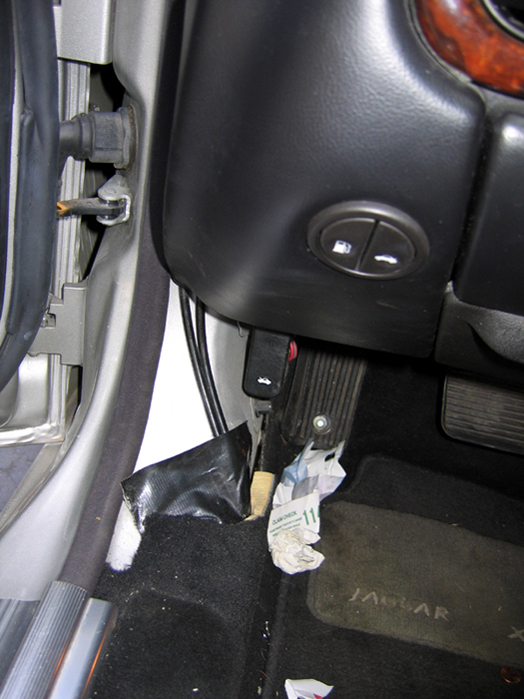
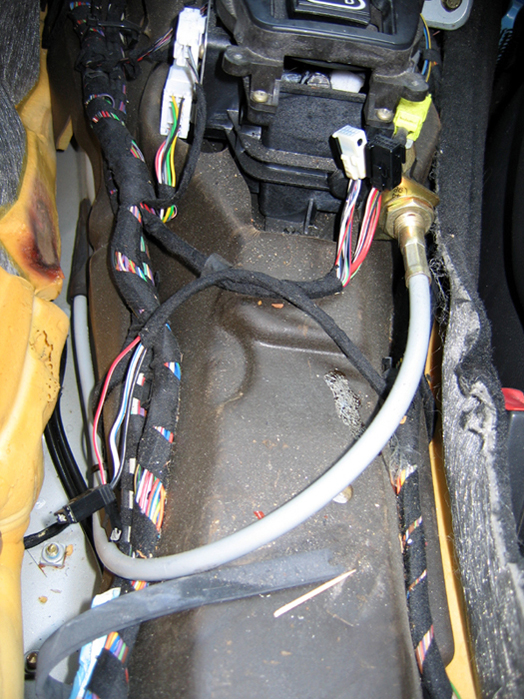
Under the carpet drivers side  
 

Removed the drivers seat to have access to Hyd hose under the carpet in front of the seat and down the left side of the center console to the rear.  
 

A view of the Hyd hose down the side of the center console to the rear 
 

Along the rear under the rear seat from the console to the right rear Hyd cylinder where it goes to the rear compartment to the Hyd pump. 

My procedure: 

 NOTE: This is for a 99 xk8.  The '07 and up XK convertible top is completely different from the '97-'06 cars 

This procedure may vary from MY cars

  1. Removed the rear seat 2 nuts located at the floor, and rear seat back 2 screws at the bottom.

  2. Removed both left and right rear cushion over the top of the speakers.  3 screws each.

  3. Removed both speaker covers left and right.  They both will snap out but have a plastic trim finisher in the rear.  Just pop them out.

  4. Removed both speakers left and right.  2 nuts at bottom and 2 screws left and right of each speaker.  Remove 2 plugs each.  The speaker is a little hard to remove with the brace above it in place but can be done.

  5. Removed the drivers seat 4 bolts and one plug.  Keep the power connected because you will need to move the seat forward and back to access the bolts.

  6. At this time I turned the pump valve counter clockwise to the manual operating position. Lowered the 2 rear quarter glass (press the lower position roof button) and unlatched the front roof locking mechanism with the key wrench located at the pump.  I then installed my straps at the rear top cylinders (both sides) to unlock and lowered the top.  Note:  all you need to do is apply enough pressure on the rams to release the linkage you will hear the linkage release.  If I thought I would do this again I would make a tool to do that.  It is not as difficult as one would think.  However; every effort should be made not to bend any of the roof linkage.  Doing it this way I did not need to apply pressure to any of the linkage.

  7. I then removed the center console.  Remove the plastic around the shifter, removed 4 screws to remove the wood around the shifter.  Under it you will find 2 screws under the radio and at the rear of the console remove the cover and under it another 2 screws.

  8. Remove the covers on both the left and right post (interior), remove both sun visors 2 screws each and the visor latches 1 screw each, remove the interior light it snaps out and then remove the cover along the top (inside) this snaps out as well.  You will also have a few plugs for the lights to remove.

  9. On the top of the window where the locking mechanism is you will need to have access.  To the right and left you will have a screw under the rubber seal.  I only unscrewed one side.  You will also see 2 screws on the top to the left and right of the latch.  Then move the cover out of the way.  Keep in mind that it is still connected on the other end and do not bend.

  10. Now you can remove the latching assembly.  Some screws you will need to remove and others you will just loosen.  Drop the assembly.  If you replace the latch you will need the key wrench to manually lock the latch.  In doing so you put the pin you need to remove in position.  Remove the C clip and pin.  Open the linkage over the top of the Hyd latch and remove the Hyd latch.

  11. One thing I failed to mention the replacement hoses must be an open and close hose (2 lines).  When I replaced the hose at the latch I noticed an "F" stamped (new) on one of the hoses at each end.  The line I removed had the same markings not stamped but with tape.  Be sure to replace the line in the same order.  This is an area that has never been mentioned in all the info I found on it.  I have confirmation that the hose is directional.  If the latch does not work properly after replacing the hose you may have the hoses crossed.  If this is the case change it at the pump.

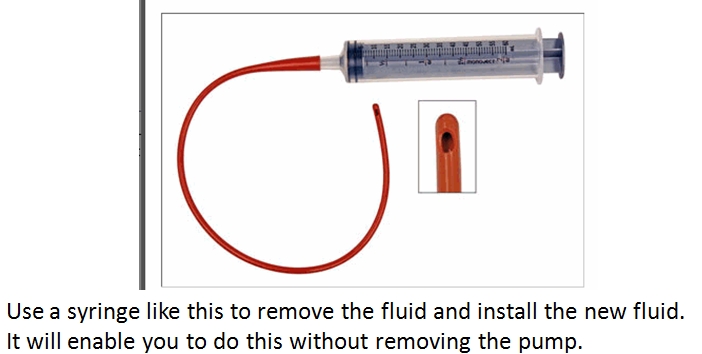
You now have the Hyd latch replaced and you just need to reverse the process to get it back to normal.  To replace the Hyd hoses you will need to follow the same path as the one that was installed.  What I did was to remove the old as I went along using the old Hyd line to pull the new one as I went along.  One of the hardest parts of dong this was at the fuse panel, under the carpet drivers side and where it goes into the trunk.  Pulling with the old hose made it easier.  You will find plastic clips along the way, however; you will find wire ties that will need to be cut and new ones installed to keep the Hyd line in place.  I removed the old Hyd fluid from the pump and installed new.  The entire job took me 6 hours.  At age 60 I move a little slower than others.

I addition The Hyd fluid that is resting in the overhead light can be removed. What I did was soak the entire light in dishwashing detergent ( Dawn) after removing all of the wires and switches (all the electrical devices). I soaked it in warm water several times and blew it out with air. As for the material it did not stain any of it. When my leak started I quickly removed the light and packed the area with paper towels preventing it from spilling causing additional damage. Hope this helps.

Good Luck if you wish to take on this project.  If you should find a better way let me know, if I left something out let me know so that others can benefit. 

Around 10/25/07 Jaguar had a hose repair kit to repair the failed end at the latch but that kit failed miserably and was removed from stock.


Follow Gus_jagrepair on Twitter

You should follow JagRepair.com on Twitter

See us on Facebook


Please support JagRepair.com


Home | Contact Us!

JagRepair.com is designed as an information resource and is not a forum.

All information provided is believed to be correct and it is given in good faith. Users of this information will use good judgment and comply with all the safety rules that apply to operating tools and equipment. JagRepair.com cannot be held responsible if any of the information provided is not correct or does not work for you. Owner of the vehicle accepts responsibility with any and all applications they choose to use.

JAGUAR and its logo are the registered trademarks of Jaguar Land Rover Limited. Jaguar Land Rover Limited is not affiliated with JagRepair.com.

JagRepair.com © 2012 - 2017 by Gus Glikas. All rights reserved.
The JagRepair logos and all proprietary artwork, photos and content are the property of Gus Glikas and may not be reproduced or distributed without expressed written permission.