|
|
|
|
|
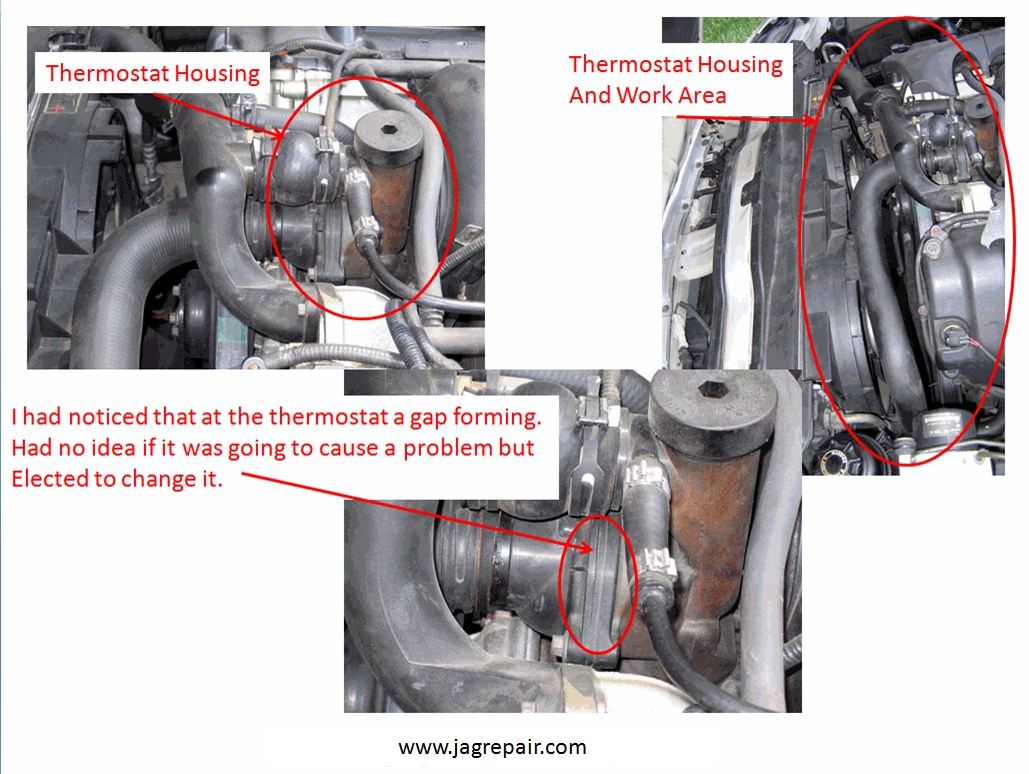
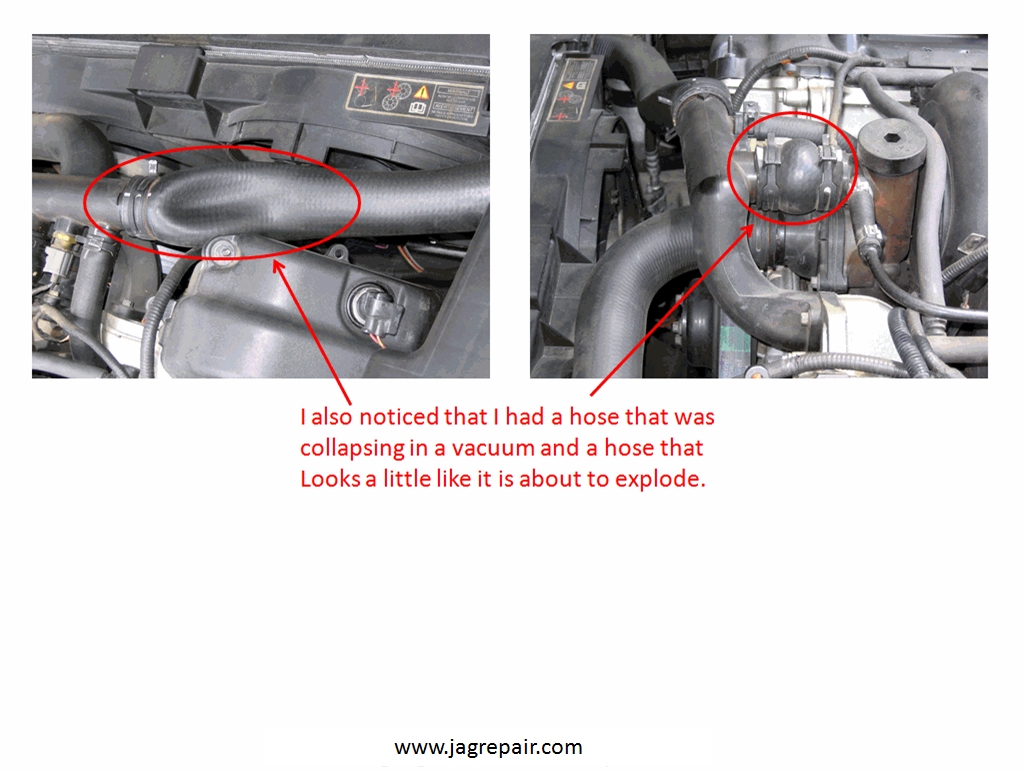
Thermostat Housing 4.0 XK8The reason for my replacing the thermostat housing was that I had heard of the old plastic type failing. I noticed on my car that the hoses seem to collapse when cold and one hose looked like it was about to explode at the housing. I felt it was time to replace it all. The water pump had already been replaced.
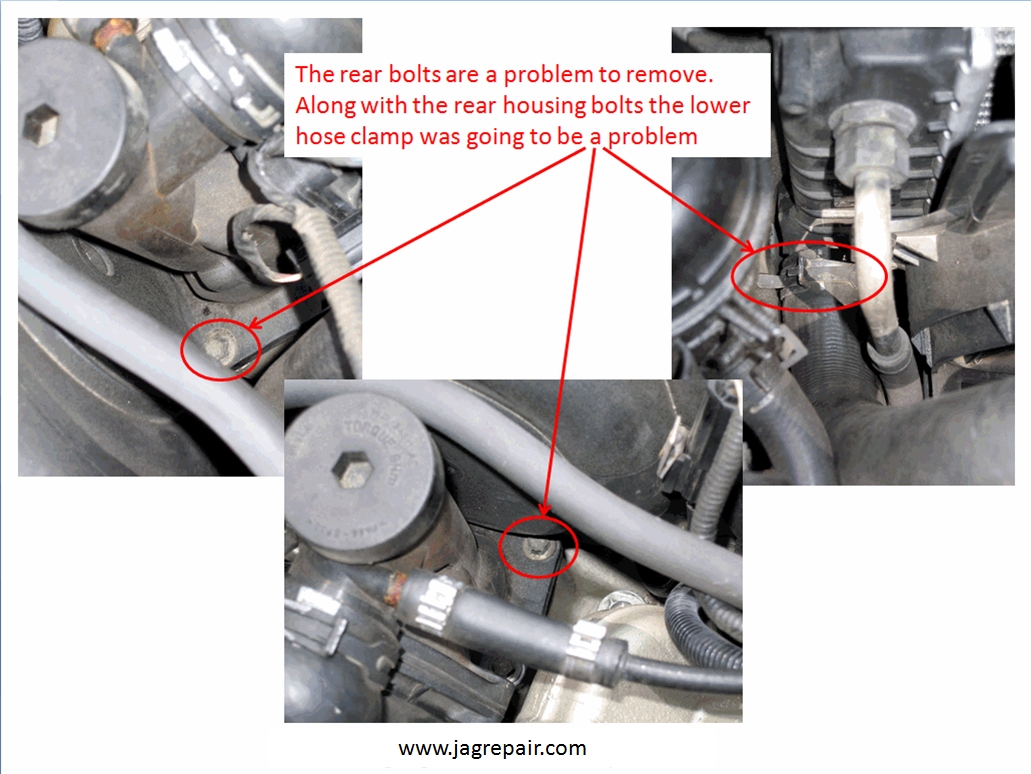
I was told by many others that the rear bolts were going to be a problem along with the clamp for the lower hose. It was suggested that bending an open-end wrench and cutting a slot in the bolt was going to help with the removal and install of the housing. I felt removing the fan housing in the process would help with the removal and install of the hose and it did.
You can see that a few of the hoses had problems.
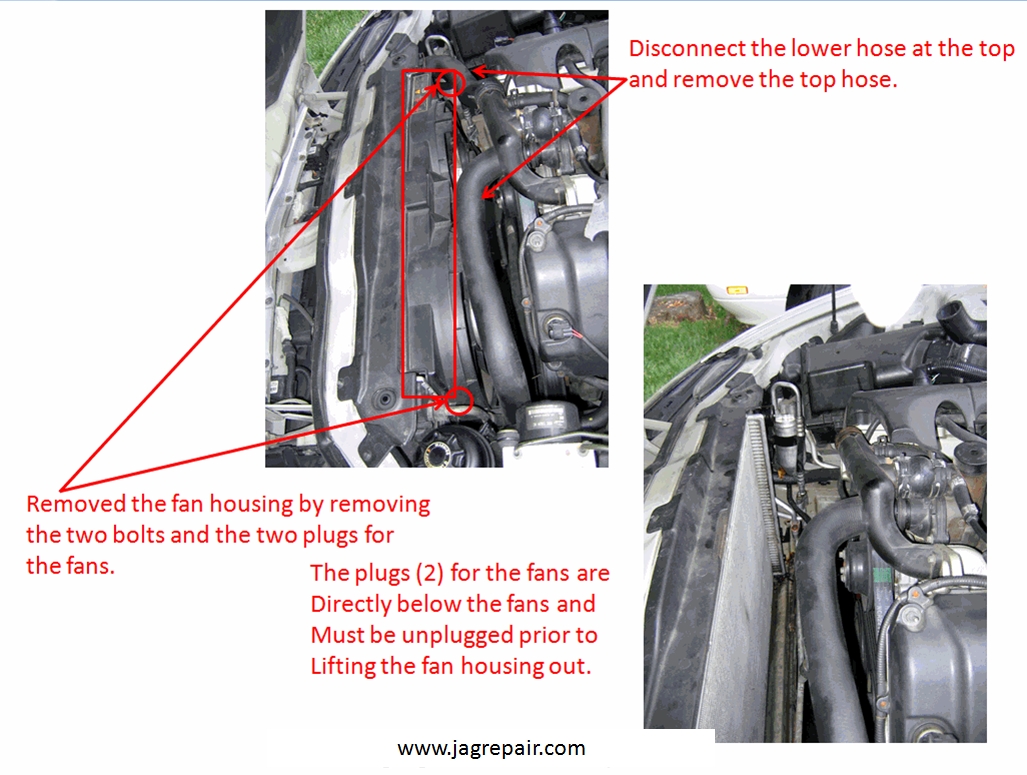
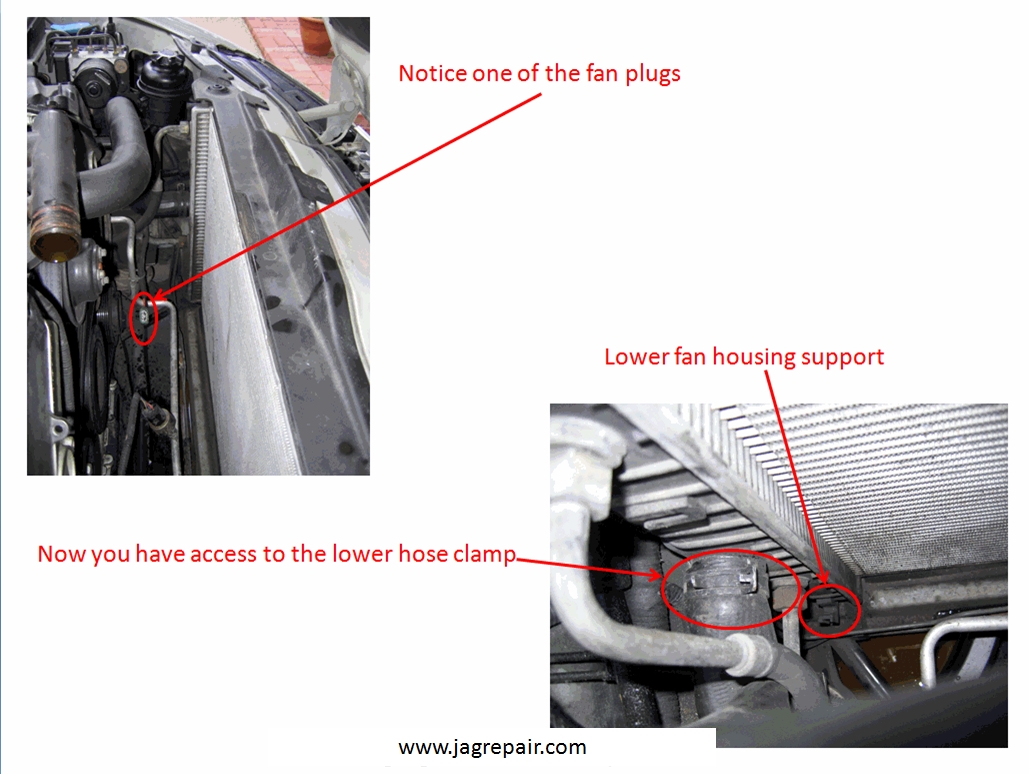
In order to remove the fan housing I removed the upper hose and disconnected the lower hose at the top. The fan housing had 2 bolts holding it to the radiator. One on each side. I also disconnected the 2 fan plugs and lifted the fan housing.
The plugs for the fan were hard to photograph with the fan housing in place so I thought I would show the opening with the removed fan plug, the housing support and the access to the hose clamp.
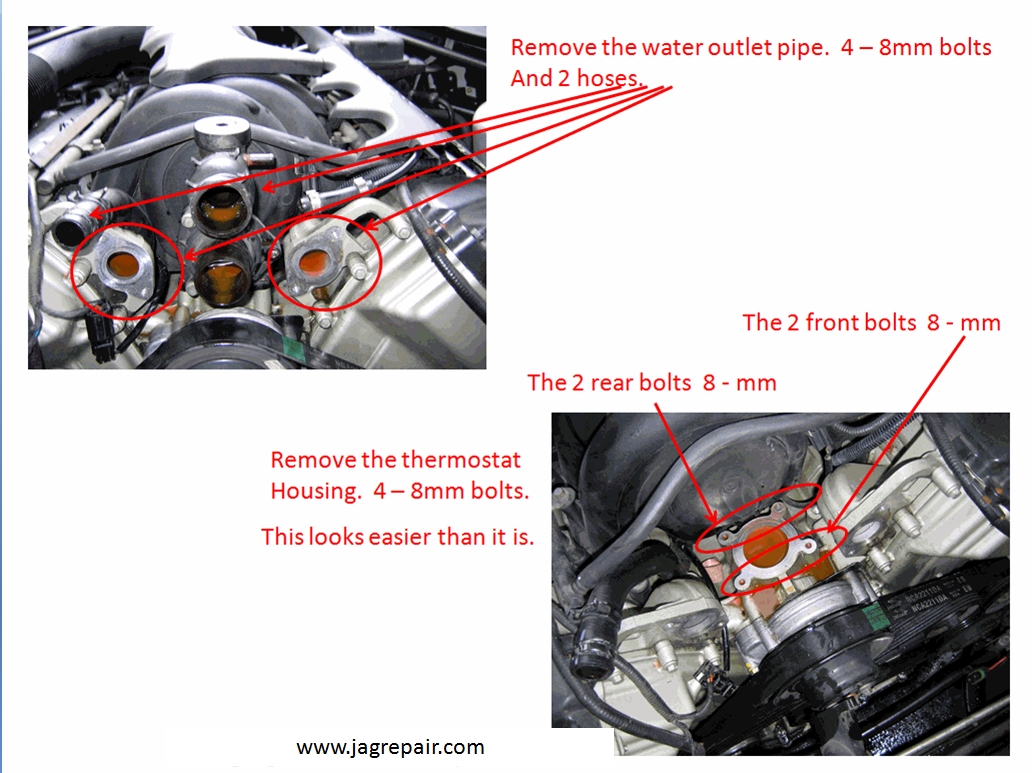
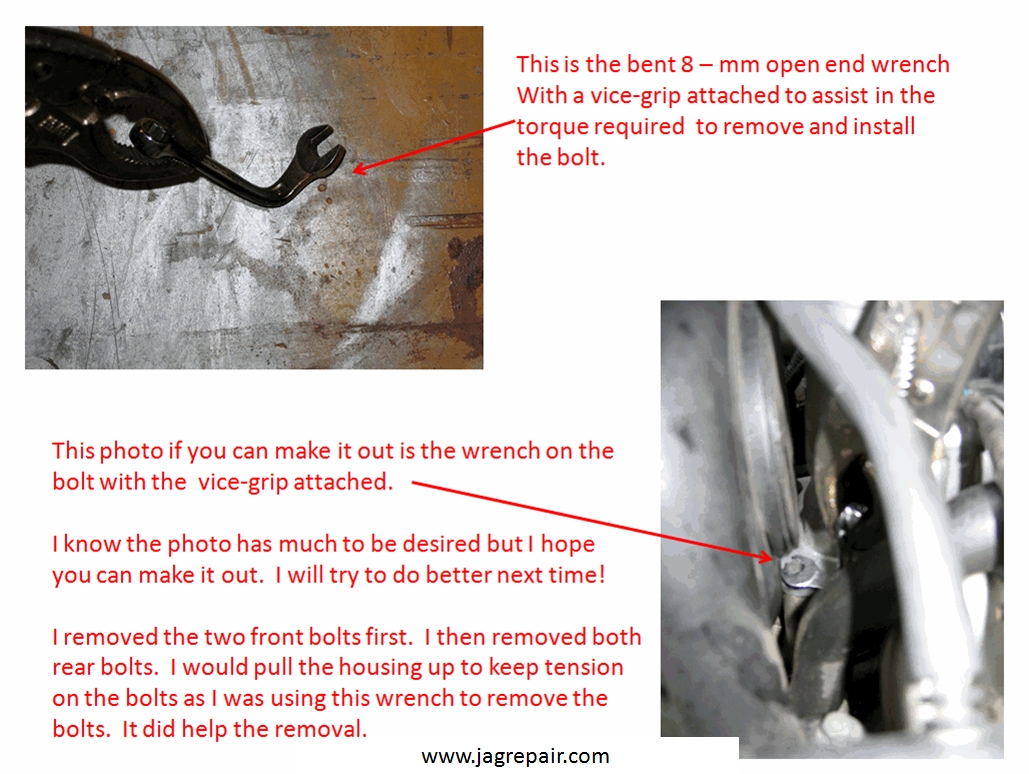
In this photo you will see that I had removed the water outlet pipe for access to the housing and you will also see that the housing is removed. The 2 front bolts were easy access with an 8-mm socket and an extension. The 2 rear bolts are a different story. Access to the 2 bolts would not be so bad if the manifold was removed. I was not ready to remove the manifold so I bent the 8-mm open end wrench and began turning. What I did notice that applying a upward pressure on the housing it would apply pressure on the bolts to make easier to work the bolts as they are being removed with that bent open end wrench.
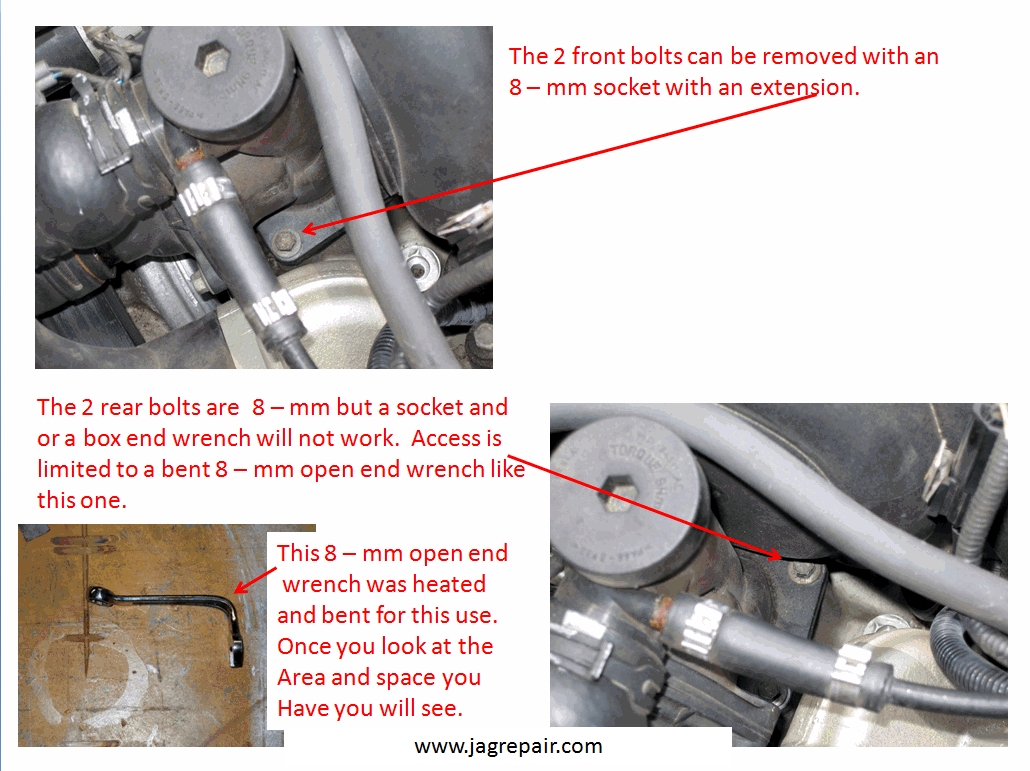
Another photo shows the front and back bolts and the bent wrench. I heated the wrench and bent it close to the open end. However I f I had to do over I would have made that section just a little longer. I would suggest purchasing a cheap wrench or two. The only wrench I had was a craftsman and I bent it. I did attempt to use short universal and it was not going to work. I then thought of using a box end but when the bolt was on the way out it would limit the space between it and the manifold not allowing you to remove the wrench to relocate to reapply. I hope that makes sense! If I were to do this again I would find replacement bolts (I think metric) with an allen head that I could use a ball end allen wrench. This would allow me to access the bolt from an angle and tighten it without a special tool.
A little more on the wrench.
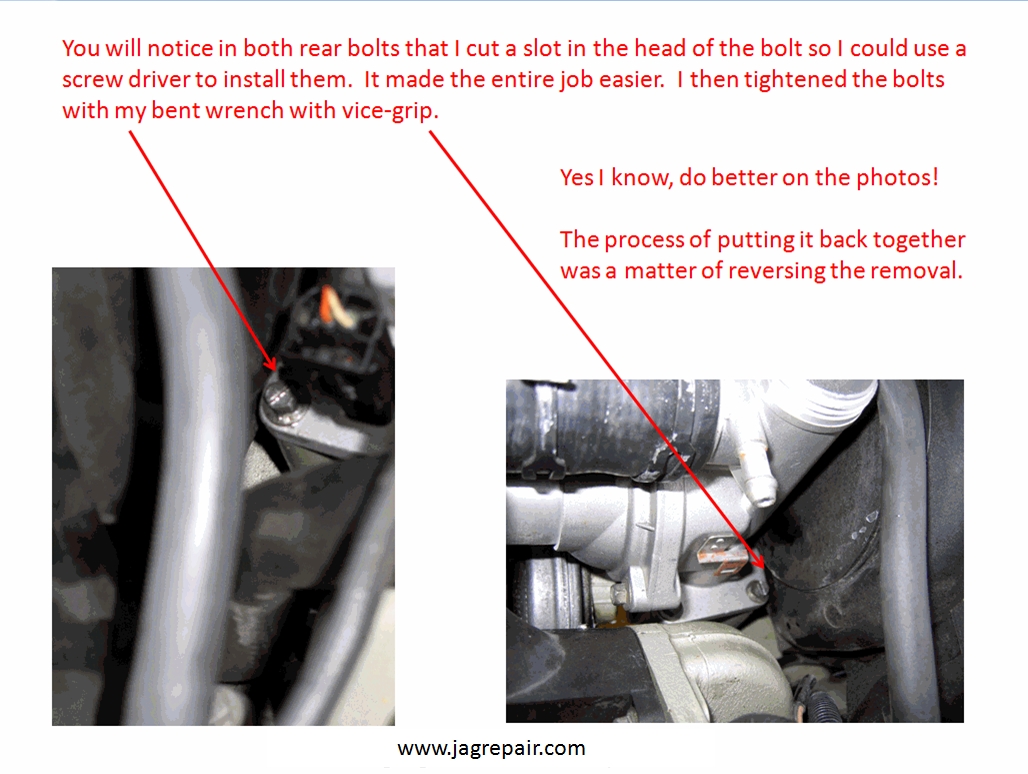
In this photo you will notice that I took both bolts and cut a slot in the head to accommodate a screwdriver. This made the job installing the new housing easier. Once they were in place over the hole I used a long screwdriver and in they went. I did, however, use the open end to tighten the 2 bolts. Did I torque them? Was not able to do the 2 rear bolts. I did not see it as a big deal.
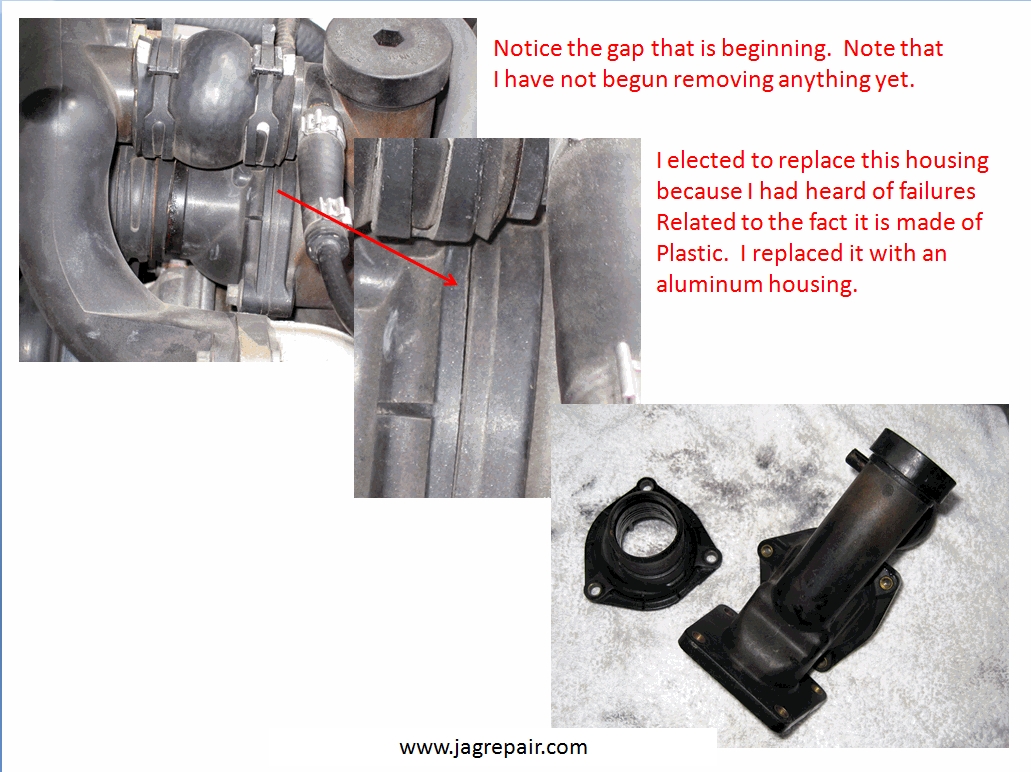
This photo shows a close up of the housing where the thermostat is installed and the slight gap that alerted me to do the replacement. I should note that I replaced all the clamps on the hoses. The reason was that the new hoses are thicker and the old clamps could be used but life is short to fight to install the old. I elected to get and install new.
The web is a great tool. When I talked to others about changing the housing I received a lot of feedback. That feed back was to bend the wrench, use new clamps and cut the bolts to accommodate a screwdriver. Thank You! The entire job took me 2 ½ hrs to complete. Note: I will have the
coolant system flushed to finish the job. I wanted to first see if I had
any leaks. I should also mention that I did not reuse the old seals.
Good luck if you take this on and if you see a better way, please let me
know. |
|
|